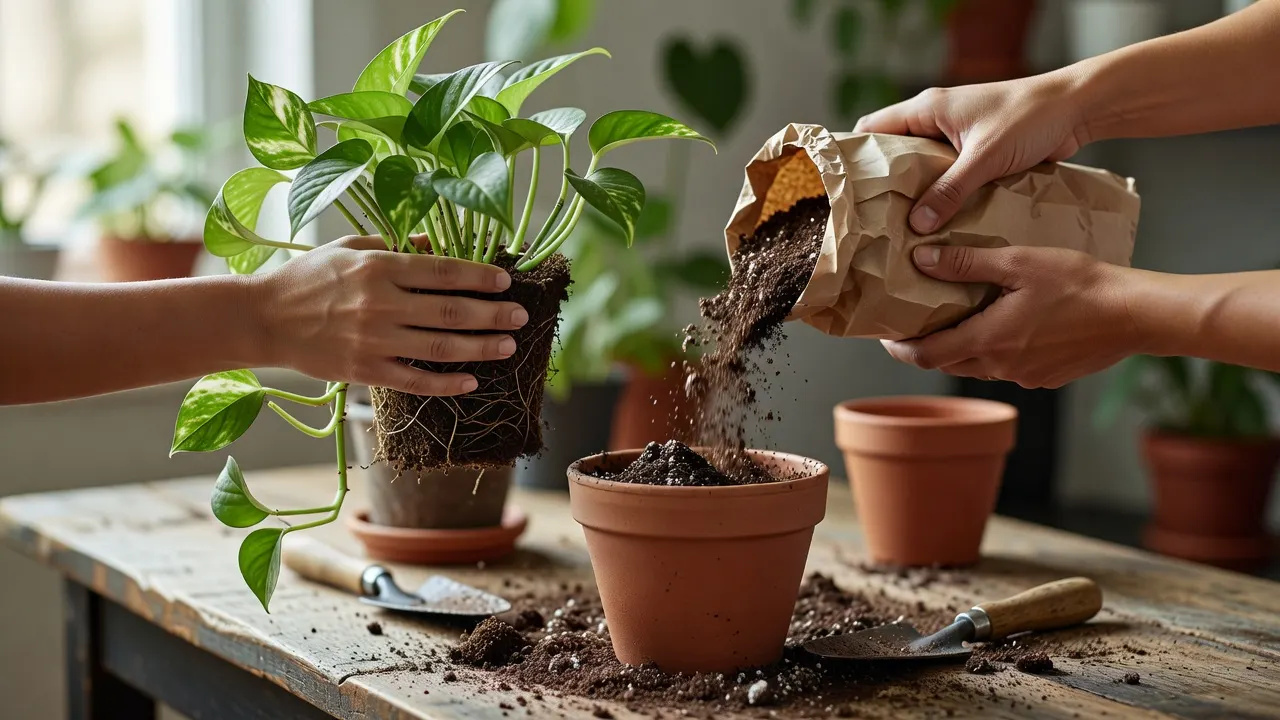
If you’re new to houseplant care, potting can feel daunting—but it’s an essential step in your plant’s growth. This guide equips you with everything you need to pot a houseplant like a pro, so you can repot with confidence and keep your plants thriving.
Choosing the right pot size and soil mix can significantly impact your plant’s growth. Our step-by-step process will help your plants flourish in their new containers. From selecting the perfect pot to post-potting care, we’ll cover everything you need to become an expert houseplant caregiver.
Why Potting is Important?
Potting a houseplant is vital for its growth and health, supplying essential elements that sustain its vitality. Fresh soil is crucial for nutrient absorption, giving the plant access to the minerals and vitamins needed for healthy foliage and blooms.
Repotting also gives roots room to expand. Rootbound plants—those with crowded or circling roots—can become stressed due to restricted development. Regular repotting helps prevent this stress by providing ample space for roots to spread, improving overall plant health.
Another significant benefit is protection from pests and diseases. When you repot, you remove any pathogens that may have been present in the old soil, reducing the risk of infection. This also prevents the buildup of salt and other minerals that can accumulate over time and lead to root damage.
Regular repotting improves air circulation around the roots. Good air flow is essential for healthy root growth, as it helps prevent conditions like anaerobic respiration that can occur when soil becomes too dense or compacted.
Choosing the Right Pot
Selecting the correct pot for your houseplant is vital for its health and growth. When picking a new container, consider several factors to ensure optimal conditions. The size of the pot is a primary consideration; aim for one size larger than the current pot to allow room for root expansion without becoming excessively large, which can stress the plant.
Drainage is another key feature. Ensure the pot has drainage holes to allow excess water to escape and prevent root rot, a common issue in houseplant care.
The material of the pot also matters, as different materials affect soil temperature and moisture retention. Ceramic or terracotta pots are porous and can regulate soil moisture better than plastic pots. When shopping for a new pot, you can find various options at retailers such as ASDA, IKEA UK, B&Q, The Range, and Dunelm.
In summary, when selecting the right pot, choose one that is appropriately sized for root growth, has adequate drainage to prevent waterlogging, and is made from a suitable material for your plant’s needs.
Soil and Fertiliser
Selecting the appropriate soil and fertiliser is important for your houseplant’s health and growth. A high-quality, well-draining potting mix is essential to provide a suitable environment for the roots of most houseplants. This type of mix allows excess water to drain away, preventing root rot, while still retaining enough moisture for the plant’s needs.
When choosing a potting mix, look for one specifically formulated for your type of houseplant. For instance, succulents generally require a mix with extra drainage, while moisture-loving plants may need a more fertile soil. Always check the plant’s specific requirements to ensure the best compatibility.
In terms of fertiliser, organic options are often preferred as they release nutrients gradually and are less likely to burn the roots. A balanced fertiliser with an N-P-K ratio (nitrogen-phosphorus-potassium) of 10-10-10 is suitable for most houseplants. Apply the fertiliser according to the package instructions, which usually recommend adding it every four to six weeks during the growing season.
When in doubt, it’s better to err on the side of caution with fertiliser. Too much can stress the plant, whereas a slightly nutrient-deprived plant is often more resilient than one that has been over-fertilised.
Step-by-Step Potting Process
To pot a houseplant successfully, follow these detailed steps:
- Prepare the New Pot: Choose an appropriate new pot with adequate drainage holes at the bottom. Start by placing a layer of drainage material like pebbles or broken terracotta in the base.
- Remove Plant from Current Pot: Carefully extract your plant from its current container, using a trowel or hands to avoid root damage. If necessary, cut away some soil around the edges if the root ball is tightly packed.
- Plant Placement: Position the plant in the new pot so that the top of the root ball is at the same level as the surrounding soil surface, or slightly above it. This prevents overburdening the roots.
- Add Soil and Fill Around Plant: Add fresh potting soil around the plant, pressing gently to remove air pockets. Ensure there are no gaps between the soil and the sides of the pot.
- Water Thoroughly: Water the plant thoroughly after potting to settle the soil and ensure proper hydration.
- Final Check: Once excess water has drained from the pot, add a final layer of mulch or drainage material if needed to maintain moisture levels and prevent weeds.
Post-Potting Care
After successfully repotting your houseplant, proper post-potting care is essential to ensure its recovery and continued health. The immediate steps after repotting are important for helping the plant adjust to its new environment.
Water the plant thoroughly after repotting to settle the soil around the roots and provide necessary moisture for initial growth in the new pot. Use room-temperature water to avoid shocking the plant with cold temperatures.
Keep the plant in a shaded area for the first few days following repotting to allow it to recover from stress and protect leaves from excessive sunlight, which can burn them during this sensitive period.
Resume normal care once the plant has adjusted, but be mindful of the watering schedule. Initially, water more frequently but in smaller amounts until signs of recovery appear, such as new growth or greener leaves.
Avoid using fertiliser for the initial weeks after repotting as roots are settling into their new environment. Be careful not to overwater; allow the top inch of soil to dry out between waterings.
Ensure your plant receives ample light but avoid direct sunlight during its recovery period. Gradually introduce it to more light as it becomes acclimated to its new surroundings.
Refer to the plant’s care instructions for any unique requirements after repotting. By following these steps, you’ll give your houseplant the best chance to thrive in its new pot.
Common Mistakes to Avoid
One of the most common mistakes in potting houseplants is over-potting. Regularly repotting your plants can stress their roots, as they need time to adjust to new environments. This stress can hinder growth and weaken the plant’s overall health (RHS Education Programme). It’s essential to wait until your plant’s roots have outgrown its current pot before repotting. Signs of an over-potted plant include waterlogged soil and yellowing leaves.
Lastly, neglecting post-potting care is another mistake. After repotting, it’s important to water your plants gently to settle the soil around the roots and ensure they have access to moisture. Avoid overwatering, as this can cause root rot and further stress the plant (RHS Education Programme).
To summarise, avoid these common pitfalls: potting too frequently, using garden soil instead of a suitable potting mix, not providing enough space for root growth, and failing to give adequate post-potting care. These mistakes can significantly impact your houseplant’s health and longevity.
Checklist for Successful Potting
To ensure a successful potting experience for your houseplants, follow this checklist:
- Prepare the New Pot with Drainage Material: Before placing your plant in the new pot, add a layer of drainage material at the bottom to prevent water from pooling and causing root rot. This could be small stones or broken pieces of terracotta pot.
- Water Thoroughly After Repotting: Once the plant is in its new pot, water it thoroughly to help settle the soil and reduce stress on the roots. This step is important for the plant’s recovery after repotting.
Your next steps
- Choose the Right Pot: Select a pot that is 1-2 inches larger in diameter than the current pot, ensuring adequate space for root growth and air circulation.
- Prepare the Soil Mixture: Use a high-quality potting mix suitable for your plant's specific needs. Add fertiliser according to package instructions if necessary.
- Carefully Remove Plant: Gently remove the houseplant from its current pot, being careful not to damage the roots.
- Re-Potting Process: Place the plant in the new pot, ensuring that the top of the root ball is level with the soil surface. Fill around the base with soil, pressing gently to remove air pockets.
- Water Thoroughly: After re-potting, water the plant thoroughly to settle the soil and ensure it has enough moisture for its new environment.
Sources
- en.m.wikipedia.org/wiki/Cannabis_(drug)
- direct.asda.com/george/home/pots-pans/D26M08G08C12,default,sc.html
Facts, prices and links checked on 25 October 2026. Prices and features change, so confirm on the official pages before you decide.
How we researched this: we compiled this guide from the official and independent sources listed above, checked prices and facts on the date shown, and did not test the products ourselves. Our editorial policy explains how we choose and check sources.